Pistachio Fruit Tart from Antique Bakery
- Penguin Snacks
- Sep 22, 2015
- 5 min read

My dear Readers,
In this installment of my ultra-cool blog, I’ll be talking about Yaoi. Be forewarned, we are now venturing into a land that is not exactly G-rated. If any talk of such things is uncomfortable for you, please feel free to skip down to the recipe part, which I can promise you is much worth, such delicious.

For anyone who doesn’t know, Yaoi is anime or manga that focuses on male x male love, typically written for women by women. Basically, it’s the your typical romance novel, just with pictures and guys. I find the entire phenomenon of Yaoi extremely fascinating, because it’s unusual if you think about it. Women writing romance stories about male homosexual relationships…you’d think Yaoi would be directed at a male audience, and while it does appeal to gay men, a large part of the fanbase are women, dedicated women, who are happy to find any kind of material that is catered towards the female gaze.
This past weekend was Yaoi-Con in San Francisco, and since a few of my friends were planning to go, I decided to bum along with them, despite knowing very little about Yaoi. Quite unexpectedly, I had an amazing con experience! The con was small enough that I got to see everything I wanted, but big enough that I was never lacking anything to do. I saw some great panels (the Female Gaze panel springs notably to mind), and the Artist’s Alley (my favorite place for scoping out original art) was small, but packed with a ton of fun stuff!
Perhaps the best part of the whole experience was being able to hang out with my best friends, and I had such a fun and relaxing time with them. Thanks, guys! So, because I had such a great time, I decided to do commemorate my first Y-Con with a tart recipe for the tart on the cover art of the Yaoi manga/anime, Antique Bakery. And guys, even if you aren’t a fan of Yaoi, you will be a fan of this tart.

The Ingredients

For the Crust:
2 sticks unsalted butter, softened
1/4 cup sugar
pinch of salt
1 tsp vanilla extract
1 large egg yolk
1 1/3 cups flour
2 1/2 oz, or 1/2 cup finely ground unsalted pistachios
For the Pastry Cream:
2 cups whole milk
1 vanilla bean, split and with seeds scraped out*
pinch of salt
1/2 cup sugar
2 eggs
1/4 cup cornstarch
4 tbs butter
*Because I’m too poor to buy vanilla beans, I instead used about 1 tbs of vanilla extract, mixed in with the butter at the end.
For the Fruit Filling:
about 1 and 1/2 quarts of Strawberries, depending on the size
1 container blueberries
a few pistachio halves
a spoonful of Apricot jam thinned down into a glaze with water
Special Equipment:
A tart pan with a removable bottom
A food processor
Pie weights or dried beans
Recipe adapted from here.
How to make the Pistachio Fruit Tart

First, unless your pistachios come pre-ground, you’re going to have to pulverize your nuts (ooh…that doesn’t sound so good, does it?). I started by de-shelling my nuts, separating out any little nuts that had split in half by themselves for decoration. Once you have a full half-cup of nuts, either pop them in your food processor and grind away (haha) or pop them in a ziplock bag and smack the heck out of them with a rolling pin or something (if you choose this method, it will take you a very long time to get them as fine as you need for the crust. Be warned.).


Second, remove the nut flour and pop the butter, sugar, and salt into the food processor (if you don’t have a food processor, you can use a hand or stand blender, no prob.). Beat until creamy, and then add in the vanilla and egg and beat in.

Finally, add in the nut flour and the regular flour, and mix until just combined.


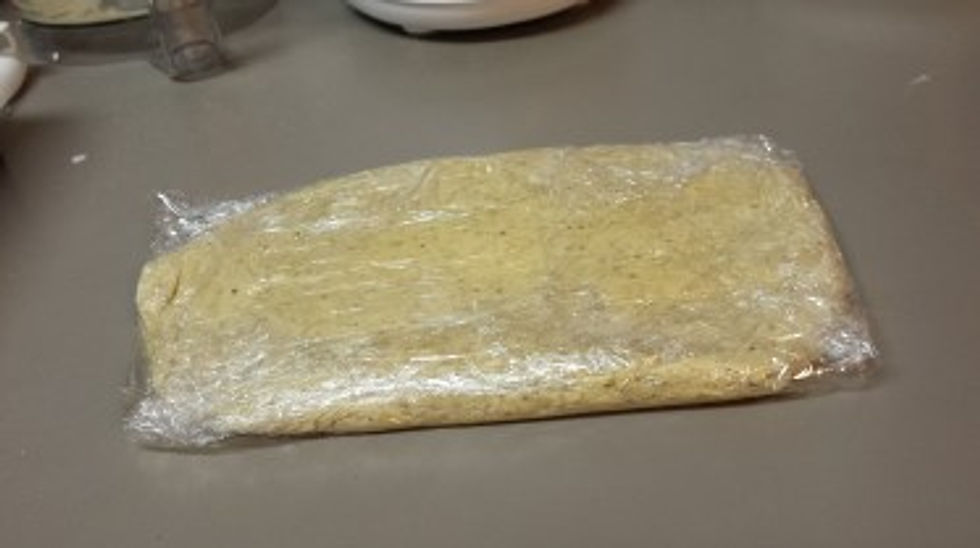
Slap your dough out onto some saran wrap, spread it thin and in the general shape of a circle, if you can, and pop in the fridge for 30 minutes to cool (or the freezer for 10 if impatient, like me). Now is a good time to preheat your oven to 350 Fahrenheit.
Once it is all chilled, roll out the dough between two pieces of plastic wrap (to prevent sticking), until you have a circle of dough wider than the circumference of your tart pan (about 13 inches across for a 10 inch pan).

Flop it over into the pan, and trim the edges so that it’s all nice and tidy.

Then, remove the plastic wrap and place a piece of parchment paper over the dough. Weigh the bottom down with pie weights or dried beans, to prevent the shell from bubbling up as it cooks.

Place it in the oven for 30 minutes, removing the parchment and weights about halfway through. In the end, the whole thing should be nice and golden brown. The original cook time was 45 minutes, but my oven took way shorter, so just keep your eye on it. When the edges start to brown is a pretty good time to remove the weights and let bake all the way through. Once it’s done cooking, allow to cool completely.

While the tart shell is baking, make the pastry cream.
Bring milk, vanilla bean and seeds*, and salt to a boil (careful, this will happen all at once) (*I didn’t use the vanilla bean here, but you should if you can).

While the milk concoction is heating, whisk together eggs, corn starch, and sugar.

Once the milk is bubbly, remove the vanilla bean and pour about a half cup into the egg mixture, whisking furiously the whole while. This is called tempering the eggs, because you bring the egg mixture up in temperature so that it doesn’t turn into scrambled eggs when you place it all in the milk pot.

Next, scrape the egg mixture into the rest of the milk, and cook until the cream begins to thicken, which will happen all at once, so be careful and stir (but don’t scrape the bottom, you don’t want to get burnt custard in your cream).

Then, if you have lumps, strain the cream into a bowl, and throw in the butter (and about 1 tbsp of vanilla extract if you didn’t do the bean). Stir until butter is completely melted.

Next, cover with plastic wrap so that the plastic touches the cream (to prevent a skin from forming), and cool completely (about an hour) (OR you could put it in the freezer for like 30 mins!).

Once both the shell and cream are cooled, loosen the shell from the pan. To do this, just pop the shell out, and resettle it in the pan.
Spoon in the cream, and spread it out.

Then, prepare your fruit by rinsing, drying, de-leafing the strawberries, and making any pistachio halves you need for decoration. Start placing your strawberries in.

Strategically place the blueberries in between the berries.

Glaze the fruit with the apricot glaze. I just dabbed the glaze on top of everything and let it slide down the fruit.


Place pistachio halves carefully.

And you are DONE!!


This tart is so, SO good, super fruity, creamy, and delicious. The pistachios add a wonderful creamy, nutty undertone that perfectly compliments the berries. The crust is so crumbly, the crunch of it goes nicely with the smooth, vanilla cream. I love this tart as much as I loved my time at Y-Con.
Thanks for reading! Hope you enjoyed, and I hope you can try it out! If you have any suggestions for recipes I should make, leave a comment below. If you have any questions or comments, leave them below as well! 🙂


Comments